The Fresh Loaf

A Community of Amateur Bakers and Artisan Bread Enthusiasts.

JonJ's blog

JonJ's picture
JonJ

Our recent babka community bake gave me a hankering for what my grandmother would call 'bulkas/boolkes/bulkes' - yeasted cinnamon buns made with milk.

They are simple, soft and buttery, and not too sweet or as complex as babka. Lovely to eat when spread with butter. We also like to have them as the perfect food for breaking the Yom Kippur fast.

Orna Purkin has a great recipe which uses commercial yeast. She has an interesting YouTube channel that has a couple of variations and a clever technique for shaping the buns.

They're easy to make with commercial yeast, but I do like my yeast water lately, which also seems fairly osmotolerant and can handle the sweeter doughs. These were made with apple yeast water (pictured below) and I did a double build before using in the final dough. For the first build 50g of apple yeast water was mixed with 78g of bread flour and left for 8 hours. This was then used in the second build for which an additional 148g of bread flour and 94g of water was added, this was then left in the proofer at 27 deg C for 12 hours and used in the final dough the next morning.

Fizzy apple yeast water


The final dough formula was adjusted to take into account the yeast water levain. All of the second build yeast water levain was used (about 370g). To accomodate this, the amount of milk in the final dough was reduced down to 107g of full cream milk, when compared to Orna's recipe, and the total amount of flour was reduced to 314g. Another adjustment was that I used some cake flour which gives a softer crumb that I tend to prefer, so that 314g of flour was 206g of cake flour and 108g of bread flour. Because I was using the yeast water I didn't deliberately degas the dough prior to shaping, but since shaping involved rolling it flat with a rolling pin some degassing couldn't be avoided!

Fermentation times were 2 hours for the bulk ferment, after which the dough had risen in size by about two-thirds. The bulkas were then shaped (the dough unfortunately cooled a little in my cold kitchen). It then went back into the proofer for about another hour or so to bulk up. Had nice oven spring too.

These are lovely and quick. The crumb below is crying out to be eaten with butter whilst still a little warm!

-Jon
Bulka crumb

JonJ's picture
JonJ

Have been loving the yeast water. 

I've recently made Hamelman's Swiss Farmhouse bread from the community bake. So interesting and it surprised me that my somewhat fizzy water has such great leavening power.

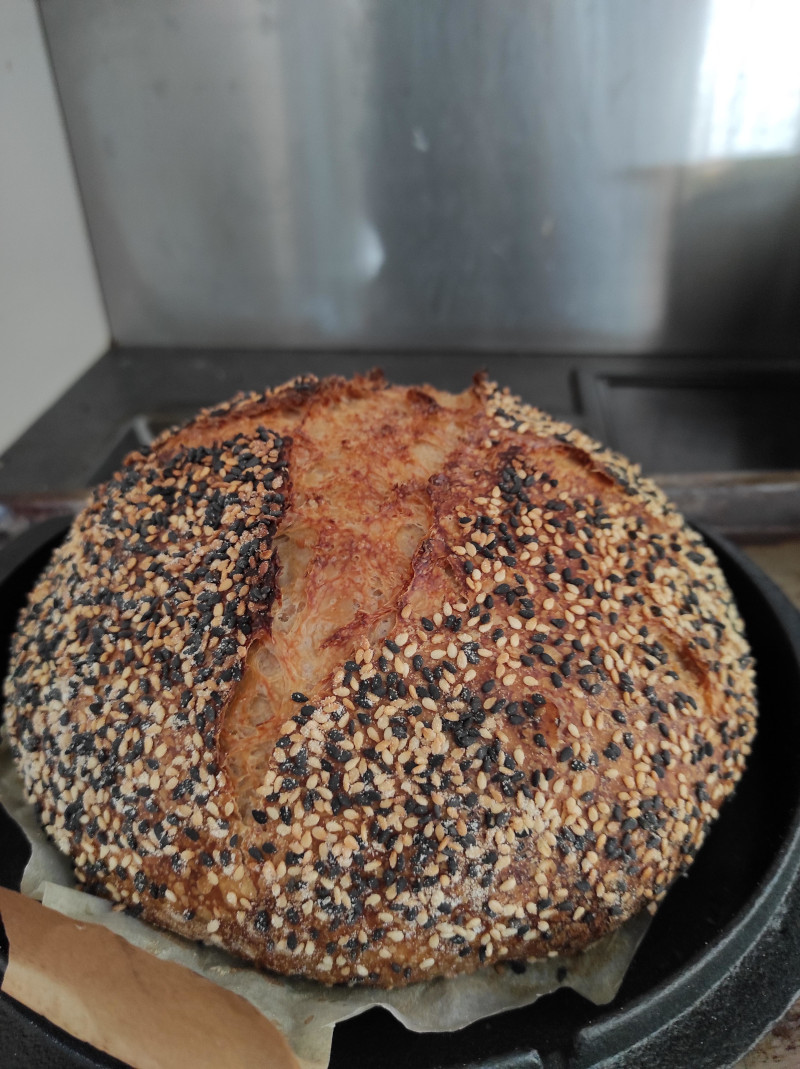
Since there was leftover yeast water from making the CB bread I wondered what a yeast water bread would taste like without the raisins and if it would still have as strong a raisin flavour to it. And I do like what seeds and nuts as inclusions bring to a bread, so made this loaf, replacing the walnut and raisin inclusions with 50g of a seed mix of my own (pumpkin, sunflower, brown and golden linseed, sesame) and another 50g of nuts (almonds, pecans and walnut).

Other than that most of the method followed was as per Hamelman's recipe.  The nuts and seeds were laminated in. This time around the fermentation, although lightning fast compared to sourdough was slower than with the Swiss Farmhouse, possible because of the lack of raisins. Bulk fermentation was 2.5 hours and final proof just shy of 2 hours, with the aliquot showing 120% increase at the end. With the original recipe the aliquot grew even larger - to 167% and perhaps I should have let it raise even higher, but still learning what I can get away with with the yeast water!

I did err on the side of caution and popped the banneton into the freezer while the oven was warming just in case the dough would spread when it came out. I never know how long you can get away with the freezer for, but it seems to be longer than I expected and up to an hour has been fine. For this bread it was around 50 minutes.

Taste was exceptional. The pecans really came through (most of the nuts did, actually). There wasn't a raisin taste either, although there was certainly no sour taste as you'd get with sourdough. It was especially lovely to eat with a nut butter, but we went to town and also tried it with avo, a 'Labneh' cream-cheese and Speculoos spread.

So I had two different kinds of raisins that I tried. Ended up using the jar on the left which had the larger raisins made from Hanepoort grapes. Raisins are seeded and still have stalks.

JonJ's picture
JonJ

The Tartine book has an interesting variation on the semolina bread called "Golden Raisin, Fennel Seed, and Orange Zest." I've got a friend who makes this bread, but substitutes the raisins for cranberries and calls this her "Christmas bread."

I used a 100g bag of cranberries which were presoaked in boiling water (120g after drainage).

Also, I've struggled in the past with semolina 'rinacinata' in bread, so I developed two doughs and laminated them together with the inclusions, this let me develop the gluten in the semolina dough at  lower hydration and get quite a strong dough upfront. In the pic below of the two doughs the semolina dough (70% of the flour) is the bowl on the right and the bowl on the left (30% of the flour) is strong bread flour dough. I used a little bit less water than Chad (used 330g of water in total, whereas the book had 375+25g listed), but followed what the dough felt like it could hold.

The bread had the lovely yellow semolina colour, and was my first successful high semolina bread! Think I have the double dough lamination to thank for that!

Taste wise the fennel seeds do dominate, so it isn't an everyday bread, but the combination with orange zest, coriander and cranberries was quite interesting to try out. Perhaps too, that floral linalool flavour from the toasted coriander seeds is the thing that held the flavour and made this an interesting bread.

In the light by my window it looks a little golden.

JonJ's picture
JonJ

Wheat pulp bread formula

This has to be one of the most interesting (to me) breads I've made in the last couple of months. As I was making it I kept on thinking that this was quite mad scientist and couldn't possibly work.

It all started when I read a stray comment from David (headupinclouds) about the "wet sprouted grain path"....which led me to find Wendy's interesting post here from 2018 about Reinhart's Sprouted Pulp Bread.

And from there it was a short hop skip and jump to take those first tentative steps onto the "wet sprouted grain path". At least some of these tenative steps have been self inflicted, it would have certainly been easier to read Peter Reinhart.

At the time I didn't have Reinhart's "Bread Revolution" book, so the formula that I came up with to make my own was based off some assumptions. The first thought was that maybe 150g of wheat berries to 300g of flour would be a good starting point. It was harder to guess how much water to add, so I assumed that roughly 10% of the mass of the wheat berries was water and germinated the wheat in a closed glass jar so that I could have a rough idea of the added hydration. Also, I made the assumptions that 3 days would be about right for germination of the sprouts, although my kitchen is a cold 17 deg C at this time of the year.

And, based on these assumptions, and treating the sprouted wheat as another flour I initially aimed for '70% hydration' overall, figuring that it is better to be underhydrated and have control over the dough and add in water later by bassinage if needed. It turned out to be needed too - 50g of the water listed above in the formula needed to be added in via bassinage. The wheat husk and endosperm are certainly good at doing what they do when it comes to locking in (or out) the moisture.

The food processor with the sharp metal blade was used for pulping the sprouted wheat berries, and since I didn't really want to wash multiple containers I also used it for mixing the dough. I started out with a slurry of levain and the initial amount of water (178g) and into this the sprouted wheat was added for pulping. It was necessary to run the machine for around 3 minutes until the mixture no longer showed large wheat pieces. On top of this the high protein sifted bread flour was poured, with a total mix time thereafter of around 35 (20+15) seconds to make the final dough. There was a rest between the two mixes so that the dough could fermentolyse. When it came out of the food processor the dough had strong gluten and was taut and rubbery, and it was then left in a bowl in the proofing box for about an hour before the salt and additional bassinage water was added by hand. The bassinage the excessive rubbery gluten texture.

If I was to repeat, I think it might be interesting to pulp the wheat berries first to see what the pulp looks like (and to smell it) on its own without the levain slurry, although the method of mixing used clearly turned out to be effective and there was nothing wrong with it.

From Wendy's post the raisins and nuts looked like interesting inclusions, but I didn't want to overdo the inclusions on the first attempt, so there were inclusions, but only a small amount of dry cranberries and walnuts from leftovers in the cupboard. Inclusions were laminated in, thereafter followed by a couple of coil folds about hourly, with shaping at a low volume increase of 20% and the banneton went into the fridge for a retard at a volume increase of approximately 45%. Normally I like to go a little bit bigger than that, but the levain wasn't as active as I'd have liked.

The levain is my new desem culture which I've been playing with storing semi dehydrated in the fridge, and probably it should have had an additional day growing in the warm proofer with one extra levain build step before use. It is weird to think that the desem levain was started from the same bag of wheat kernels that I used for this bread, at least there is some consistency with the yeast and bacteria species found on the seeds and what is being used in the levain culture, although the whole thing felt kind of cannibalistic!

This bread was lovely to eat. I can see why all the bakers who make pulp breads say they will do it again. The taste was more neutral than sweet, but it certainly did not have the sour taste notes that I associate with sourdough and wholewheat. It was a little denser than I like, and I suspect using emmer or kamut are worth exploring as Reinhart suggests, although even using regular wheat result in a "power" bread that is digestible and nutritious.

Today I bought an ebook version of Reinhart's book to finally see the recipe for his "sprouted emmer pulp power bread". Definitely on the path now. And, can see why his bread is less dense - the ratio of kernels to flour in his recipe has more flour, and he even added some VWG which I see could be beneficial. Plus, he also used a lot more of the good stuff, the raisins and nuts! Definitely will try his recipe too, there will certainly be a next time.

Sprouts

Pulped sprouts in levain slurry

Sprouted pulp bread

Slice of sprouted wheat pulp bread

JonJ's picture
JonJ

Oat porridge breads are a bit of an enigma for me really. Sometimes, I get glimmers of that fabled custard consistency and the promise of an extra special bread. And the smell of that oat topping while baking is unsurpassed. Other times, the addition of the oats just exceeds the hydration capacity of my flours. And, even worse there is that dreaded gummy layer you get at the base of the bread if you don't bake it extra long.

"Sourlotti by Abby"  has quite a clever recipe and YouTube video with an oat and flax soaker. The nice thing about the soaker is that it uses a fair amount of butter (more than I would use if I was making oat porridge for myself!) and doesn't contain a lot of water. Plus it has flax/linseed in it!

I did tweak the recipe to make it my own, reduced the hydration to 74% and gave it a longer bake than I normally do. And I used a blend of white bread flours - the ridiculously high gluten sifted hard white mixed with a lower protein supermaket flour (to give the crust and reduce that springy gluten mouth feel). Made a lovely loaf, and this is an interesting new way to make an oat bread! I think I could have given it a little longer to ferment, but I'm so nervous with oat porridge breads having experienced what can go wrong.

Cooked soaker


Method: 1 hour autolyse. Then mixed in stand mixer for 8 minutes with liquid and pourable levain (fed the night before 1:10:10 with bread flour and 11 hours old at the time). Then left uncovered in the mixer for 15 minutes. Added the salt with a 3 minute mix, removed dough from mixer, placed on counter and gave a strong counter fold. Then left covered with the upside down mixer bowl for 15 minutes. Laminated in all of the soaker. Not sure what magic I got write with the mixer, or maybe it is just that I found the appropriate hydration for the flour mix but the gluten was just incredible and I could stretch the dough super thin - see the pic! Dough then placed in the proofer set to 26°C and two sets of coil folds were given. Final shaping was performed 6 hours after adding the levain. The banneton was then placed back in the proofer for an extra hour. At the end of that time there was a volume increase of 40%. 7 hours to achieve 40% increase is long for my starter at this temp - think perhaps that my levain was a little too past the peak, or I added the salt to soon. Banneton was then placed in coldest fridge shelf for a 19 hour retard. Whilst the oven was warming the banneton was placed in the freezer for 1 hour. Bread was baked at 240°C for 25 minutes in dutch oven covered, followed by 23 minutes at 210°C for a total bake time of 48 minutes - which is longer than my normal 40 minutes.

Lamination stretch

Never managed to stretch this thin before in lamination!

Bread loaf

JonJ's picture
JonJ

Formula


Inclusions

My daughter, who is 19, came down with covid and had lost her sense of smell the day before this bake. She asked if this bread had olives or cranberries in it! Think she's on the mend now, and has mentioned that she is starting to taste things again.

This is my first bread with sundried olives. They're kalamata olives and needed to be hand pitted before baking. The sundried olives brought a fairly pungent olive taste to the bread, not unpleasant but tasted like a strong olive oil, and a different flavour to the breads I've made with regular pickled olives. Although only 20g was used in the loaf the flavour tended to dominated, but 20g of sundried olives was around 19 olives, so its fairly concentrated.

The sundried tomato, like the sundried olives, were used 'dry' and weren't rehydrated before using. They were fairly unusual in that they weren't fully dried - they have a nice amount of moisture in them and we keep them in the fridge. So it felt right to use them as they were and they were great in the bread, but next time I'll double the quantity.

The feta didn't seem to do much. The quantity of feta probably also needs to be doubled, and next time I won't crumble as finely.

This bread was made using the food processor to develop the dough, which together with the home made proofing box seems to be becoming my new standard way to make bread.

The water, chilled in the fridge overnight, and levain (from the proofer) were initially mixed in the food processor to form a slurry. To this all the flours were added and were given two 10 second pulses and then left to 'fertmentolyse' for 50 minutes. Then a series of about 4 additional short pulses of the food processor, were done patting down the dough between each pulse to give, in total, another 15 seconds of whizzing. So, a grand total 35 seconds of food processor mixing.

The dough was then moved into the proofer, set to 26°C. Prior to lamination the salt was mixed into the dough by hand, around 1.5 hours after the initial levain mix. The inclusions were laminated in, followed by 2 coil folds. Shaping was done 5.25 hours after adding the levain, with the aliquot just under 50% increase in volume. The banneton was placed in the proofer for an additional 15 minutes before retarding on the bottom shelf of the fridge at 5°C for 15 hours. Banneton was removed from the fridge and popped into the freezer while the oven was warming, which is probably why I did the crazy scoring since the top surface was stiff and easy to score! Bread was baked at 240°C for 25 minutes covered, then 220°C incovered for 20 minutes.

Really enjoying this bread flour which is made from a sifted winter hard white wheat flour. This is my first local flour that has a decent protein percentage, around 14% apparently and it just sucks up the moisture, as well as giving that ridiculous oven spring that I've been envying. It also gives that mouth feel of a high gluten bread, that not unpleasant chewy gluten in your mouth which I've only ever noticed before from added VWG! The hard red wholemeal is a sprouted flour, got a bit chopped off in my formula but think it brought some flavour to the bread, kind of hard to tell with all the inclusions.

Scoring

Baked top view

Crumb series

Crumb detail

JonJ's picture
JonJ

Recipe in bakers guild format

Have never made a bad olive bread. And the same is also true for breads made with blueberries! And when blueberry is in the dough the bread gets a beautiful painterly effect.

Previously I've made a blueberry compote and used that in the bread, but this time around I just used defrosted frozen blueberries that were then mashed. The juice from the blueberries was also used in the bread, and because of this I roasted the walnuts so that the net effect would be that one inclusion contributed extra moisture and the other withdrew moisture from the final dough. Using whole blueberries seemed to have worked well this time, although the blueberry flavour in the final bread was a little on the weak side.

I'm still going through a phase of doing long mixes in order to develop the gluten as much as possible, being inspired by some of what Mariana said about developing gluten. The stand mixer was used on its slowest setting (which is around 80rpm) with the dough hook for a very long time until the dough was no longer puddling on the bottom of the bowl and the sides were clean. This took 24 minutes in total, but in all fairness the bread flour used was a fairly weak 11.2% protein (and actually the wholemeal and wholewheat flours were in a similar ballpark too).

After mixing the dough was laminated and coil folded, but this bread was only coil folded twice in order to not disturb the blueberry swirls.

The thing that stands out for me about this bread is that fermentation was very slow. Perhaps it was the long mixing, perhaps my levain was weak to start with, but more likely it was the change of seasons and my kitchen was around 18°C (65°F) for most of the time. When the aliquot had not moved enough after 7 hours I put the dough in the coldest part of the fridge overnight and completed the bulk the next day - when it got another 10 hours before the aliquot finally reached 50%. I'm guessing that at least for the first few hours after coming out of the fridge there wasn't much fermentation activity, and also I lose trust in the aliquot once its been in the fridge (as the smaller body of aliquot dough changes temperature more rapidly than the main body of dough).

But it all worked out in the end! I loved eating this bread and was sad to see the end of it. Just love the 'fruit breads'.

This one also motivated me to go out and buy a polystyrene box and heat mat, so that winter baking won't be so painful this year. It has already changed my baking life.

Sliced blueberry bread

JonJ's picture
JonJ

Joy Ride coffee has a YouTube channel with what, for me, are quintessential quarantine videos. Videos often have a transporting sound track, and the visuals usually include beautiful tracking shots of Romanian scenery which have transported me out of lockdown. His quest for lacy crumb has been quite 'infectious', if you'll excuse the covid pun.

In his latest video there is an appealing technique for shaping directly from dough that has been coil folded. No banneton is used.

The method relies on dough preparation that included a lamination and gentle coil folds. Good dough strength is required, with the dough proofing under tension. It can include proofing in the fridge too.

Instead of performing a traditional shaping and transfer to a banneton he does something different. Dough that is already highly fermented and has already doubled in volume (at least) is gently inverted from the dish in which coil folding was being done onto a lightly floured surface. It is then gently folded over, as you would fold over an omelette in a frying pan and sealed around the edges. It is then lifted a quarter turn by means of a dough scraper to give a shape more like a batard, and transferred onto a parchment for baking. Finally, it is left for an hour covered with a tea towel before baking, although I do wonder if this additional settling is actually required.

It makes sense that this gentle shaping with very little degassing could create a better crumb. Plus, the resultant loaf has a shape that looks more or less like a traditional batard produced using a banneton.

I played around recently making a loaf with the method, but since my dutch oven is round I added an extra manipulation for pushing the batard shaped dough into a boule shape. After making the batard shape, and working my way around in a circle, I pushed in from the side moving down to the bottom, cinching the dough to the base as I went. I used two dough scrapers for this -  taking turns with each dough scraper to free the dough scraper trapped underneath the dough. Working this way I managed to get a round boule too, but as you can see from the pictures the crumb was quite unusual - there were these elongated and vertically oriented alveoli clustered near the base, almost certainly created as an artifact from my additional step of transforming the dough into the boule shape. I suspect that if I'd stopped at the batard shape without doing that last step it would have had a more regular crumb, and been more successful.

Hope this post gives someone ideas! It is exciting to try out a completely different method sometimes. What I like about it is that it has the potential to produce a better crumb and maybe even simplify the process of bread making. The number of steps could be reduced. An it might be a neat way to make bread after an overnight counter ferment.


-Jon
After removal from Pyrex dish used for coil foldsAfter removal from Pyrex dish used for coil folds

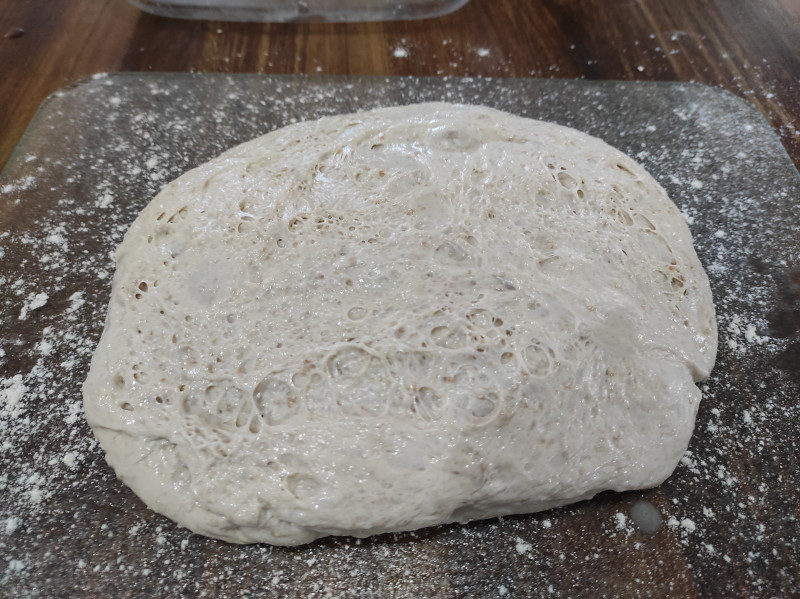
Then folded over as you would fold over an omelette in a frying pan, and sealed around the edges.

Given a quarter turn, then rounded using two dough scrapers, as described in text.
The boule shape is retained.

The additional rounding to make a boule shape seemed to result in these vertically oriented elongated alveoli. Will try again and leave it in the basic batard shape next time as I think that will work out much better.

JonJ's picture
JonJ

So, I was inspired by Dan's post to try a new drug, errr... ascorbic acid (vitamin C) in my baking. And I also did a little bit of reading up on this site and saw that Doc. Dough recommended a much lower amount than was used in Dan's original post - 20-30 ppm of ascorbic acid.

The flours that I bake with typically have a low protein percentage of around 11.4g/100g or so, and in the past when I've tried to push the hydration too far I've ended up with flat breads, so my thinking is that the effect ascorbic acid has through  strengthening the gluten by oxidative bonds is something that could help my particular breads at the higher hydration.

By adding some vital wheat gluten, I've been successfully baking with these flours at high hydration, but the 'mouth feel of the bread' isn't the best. The bread becomes a little bit too springy for my taste, and some of that soft feel in your mouth can get lost.

As you can see from the photo above, the ascorbic acid appears to have allowed me to continue making soft bread, even at the higher hydrations, and without adding VWG. Got a great crumb at 80% hydration, even an ear.

Why I say 'appears' though is that I didn't really bake a control bread without the ascorbic acid, so this is still unconfirmed. And to be fair, my baking method pushed the dough to develop gluten quickly. This may have allowed for my flours to cope with the higher hydration. The baking method used on this bread had a lot of dough manipulation up front: after the 1 hour autolyse the Kenwood mixer was used at speed 2 for 5 minutes to incorporate the levain; then for the next 10 minutes hand bassinage was used to slowly increase the hydration from 70% to 80%; thereafter the salt was mixed in by hand, and finally after that it still needed another 5 minutes in the mixer again on speed 2 before the bowl was running clean again. So a fair amount of dough strengthening immediately after adding the levain. Never mind that a lamination was done after that to incorporate the olives into the bread. It is still an outstanding question for me then if the dough strengthening manipulations on their own were what made this bread better; or even if the vitamin C allowed them to work effectively.

Adding such a small amount of ascorbic acid in the home kitchen isn't simple. By mass, and by my math, 25 ppm of ascorbic acid means the 400g of flour used in this loaf works requires 0.01g of ascorbic acid. A 500mg vitamin C tablet was dissolved in 500g of water in a jar (see photo below). I just let it sit for two hours swirling occasionally. There were still sediments in the solution once the pill was fully dissolved, for which I made the optimistic assumption that that would be insoluble parts of the binder as I think ascorbic acid itself, even in crystalline form should dissolve into the water in a couple of hours. Only 10g of that solution was then used as part of the water added to my bread during the autolyse. The remaining 490g was not used in the bread, but I did drink half of it and boy you can certainly taste that it had ascorbic acid in the solution!

I'm enjoying the soft feel of this bread, and keep going back for more and more slices. Hopefully I'll manage to work out where this bread went right, either it isn't a fluke and the ascorbic acid trick is the reason or it may simply be that hitting it hard and working the gluten strongly from an early stage is what made all the difference.

Swirl of sediments as the tablet dissolves.

 Bread in profile.

JonJ's picture
JonJ

I'm loving making breads with this interesting wholemeal - Eureka Wholemeal. It has bits of whole kernels, or I guess you would say cracked kernels, in addition to the usual bran (and germ!). I think it behaves more like a white bread flour in my baking, the dough has nice strength and doesn't seem to be hampered by the bran and tastes very nice.

Paul has previously written about his visit to the mill here - from his review I suspect "wholemeal flour is made by recombining all of the bran" means that in this case the bran is combined back into the flour and this could be why it behaves more like a regular bread flour. Although, as Paul says "I can't imagine how a split-then-recombined WW flour would taste different than a milled-all-together WW flour when using the same wheat."

It might be a South African miller thing to make flours like this - here is another one that has some cracked kernels in it (even though it is a bleached flour) - Snowflake Nutty Wheat - "18% coarse wheat bran is added for high-fibre content". Or am I wrong and this is something that is made by millers everywhere?

This bread was made using Full Proof's method for combining two doughs via lamination. The one dough was this wholemeal and the other was a bread flour dough. Both flours are fairly low in protein, around 11%. The hydration of the doughs was the same at 75% (or 77% if you include the levain in the calc).  The boule was shaped at 50% volume growth and left to prove further until 80% growth and then into the fridge for an overnight cold retard before baking the next day.

Close up

 The wholemeal dough is on top of the bread flour dough here, prior to laminating them together. You can see some cracked kernels in this zoomed in photo.

Pages

Subscribe to RSS - JonJ's blog