The Fresh Loaf

A Community of Amateur Bakers and Artisan Bread Enthusiasts.

occidental's blog

occidental's picture
occidental

I ran across this post by CalBeachBaker of Jalapeno Cheese Bread a while ago and put it on my to bake list.  Yesterday was the day.  

I prepared the cornmeal soaker before entering the formula into my own spreadsheet and deciding to scale it down to one loaf.  Since I had the full soaker I decided to put it all in, which resulted in a fairly wet dough that was challenging to work with. I had my doubts but they all went away with the first bite, which was delicious.  I don't know if I'd use double the soaker again, but the extra corn meal gives it a great crunch for sure.  

The other change I made was that I was short on jalapenos (only 3 on hand) so I supplemented the bulk of the peppers with some roasted Hatch chiles that I had in the freezer.  

The flavor of this bread is really good, my version resulted in a fair amount of spice from the peppers, softness from the cheese and crunch from the cornmeal.  Overall very tasty.  I don't have the book the formula originated from (Sourdough Recipes for Rustic Fermented Breads Sweets, Savories, and More - Sarah Owens) but I do have it on hold at the library and am looking forward to giving it a once over in the new year.

my adapted formula:


Chile Cheese Bread - scaled
 desired number of doughs:0.5       
 Formulatotal dough   
  weight  bakers %    
 starter (1:1)60flour303100%    
 flour272.5water17056%HYDRATION   
 water140salt51.8%    
 f+w412.5ADD INS:      
 salt5sriracha5     
 tot478peppers100     
   cheese100     
   soaker205 see notes   
   total888158%    
          
 Flours preferment3010%    
 BF207.5       
 semolina32.5       
 WW32.5       
 total flour272.5       
          
 METHOD: NOTES: 
 refresh starter ~8 hours before mixing soaker: 55 g cornmeal (Bob's), 150 g boiling water, left to soak overnight (used the whole thing after deciding to scale the rest of the formula down by 50% 
 mix, rest 30 minutes, knead in bowl, transfer to cambro mixed at 0830; knead in bowl at 0900; S&F at 0930, 1000; 1100; bulk ferment until 1530; shape and rise until 1700, bake approximately 45 min. in combo cooker, 20 minutes covered, remainder uncovered 
 stretch and fold(s)   
 shape into batard   
 rise ~ 1-2 hours   
 shape and bake   
         
occidental's picture
occidental

I didn't make many baguettes for several years due to having a gas oven.  Then I got an oblong combo cooker which made them, along with batards, possible again with gas.  But now that I have an electric oven after ten years with gas I remember what I was missing.  These were baked on the stone with 5 ice cubes in a cast iron pan for steam.

I've been toying with a formula for baguettes for the past few months. While I usually scale down recipes to one loaf, I like to make at least two baguettes.  I don't know if I'll stop trying other formulas, but this one sure tasted good with still a bit of warmth out of the oven.  I may just settle on this version for a while.  

Hammelman has his Vermont sourdough, and I suppose mine has now been in Idaho long enough to be taken over by the native cultures.  It started out in Oregon (~20 years there), spent some time in Vermont last winter making breads daily at a bed and breakfast, and now has made it to the Idaho mountains where I plan to keep it for a while.

So here is my current version of a baguette with just enough whole wheat and rye to give it that good country flavor.


 Idaho Country Baguettes 
 formula total dough 
  g   gbakers %  
 starter (1:1)75  flour338100%  
 flour300  water26378%HYDRATION 
 water225  salt61.8%  
 f+w525  ADD INS:    
 salt6       
 total606       
          
          
     total606180%  
          
 Flours % prefermented flour3811%  
 AP25083%      
 ww258%      
 r258%      
 total flour300       
          
 METHOD: NOTES: 
 refresh starter ~8 hours before mixing mix at 1000; knead at 1030; S&F at 1100 and 1130 and 1200; bulk ferment until ~ double in size (depends on room temp); shape at 1600; bake at 1700; first loaf is gone at 1800 
 mix, rest 30 minutes, knead in bowl, transfer to cambro   
 stretch and fold (typically 3x) then bulk rise until pillowy   
 shape into baguette(s) or store in fridge overnight, shape and bake the next day   
 rise ~1 hour while oven preheats   
 bake at 450 with steam until golden   
         
occidental's picture
occidental

I have not used spelt in the past, so I thought I'd give it a try.  I made up a sourdough formula that had 40% spelt, with 50% bread flour and 10% rye making up the rest.  Hydration was approximately 77%  The loaf turned out pretty good, the flavor was nothing distinct, tasted like a whole wheat loaf, with moderate rise and an average crumb.

If you have a favorite spelt recipe, let me know in a comment or link to it.  I have plenty of flour left and would like to explore using it in some other bakes.


occidental's picture
occidental

We had charro beans (using Anasazi beans) on the menu and some cream cheese in the fridge we needed to use.  I came up with a "Chile Cream Cheese" sourdough to soak up some of the beans.  

I ran across this recipe: https://www.thefreshloaf.com/node/42670/sourdough-batards-rosemary-and-cream-cheese and used it for inspiration, although I scaled it down for one loaf, added in the suggested whole wheat, and used a different mix of herbs and spices as well as altering the time scale.  

I replaced the rosemary and black pepper in the original with dried Hatch chiles and chipotle powder.  

The results were a very soft textured (due to the cream cheese addition) bread with a great chile aroma (not a lot of chile flavor, I'd bump it up significantly if I tried it again) that was perfect for dunking in the beans. In the formula below I just put a gram each of the seasonings, more of a reminder they are in there than a precise measure.  I used about a tablespoon of dried Hatch chile flakes and oregano and a teaspoon of chipotle powder.


Chile Cream Cheese Sourdough
formulatotal dough
 weight    bakers % 
starter (1:1)75 flour438100% 
flour400 water33877%HYDRATION
water300 salt81.8% 
f+w700 ADD INS:   
salt8 chipotle pepper (dry spice)1  
total783 cream cheese30  
   dried hatch chile1  
   oregano1  
   total814179% 
        
Flours %prefermented flour389% 
BF35088%     
ww5013%     
r00%     
total flour400      
        
METHOD: Notes   
refresh starter ~8 hours before mixing Original formula here: https://www.thefreshloaf.com/node/42670/sourdough-batards-rosemary-and-cream-cheese
mix flour and water, autolyse 60-180 minutes, mix in remaining ingredients, knead in bowl, transfer to cambro Timing: autolyse at 0730; mix at 0930 (used kitchenaid to mix in cream cheese; s&f at 1000, 1030, 1100, 1130; BF until 1600; shape, let rise until 1700; bake, cool and done at 1800
stretch and fold in 30 minute intervals for 2 hours, then bulf ferment until increased 30-40%  
   
shape into batard, rise 1 hour  
bake at 475, 20 minutes covered, 15 minutes uncovered 


occidental's picture
occidental

I kept at the experimentation with the blue corn sourdough after using some in the community bake. This time around was a bit simpler approach.

I started with 100 grams of 100% hydration starter

I scalded 75 grams of blue corn flour with 150 grams of water (probably wasn't enough water in hindsight as this is a thirsty flour).

I then mixed the starter with 300 grams of bread flour and 260 grams of water, 6 grams of salt.  I made the dough higher in hydration thinking that the corn may dry it out some.  After the mix and a rest I added in the corn.  It was a bit clumpy but after a couple stretch and folds it finally was incorporated into the dough, more or less.

I baked this in a combo cooker, 20 minutes with the lid and another 25 without.  It was pretty slack and moist when I did the final shape, so I was pleasantly surprised to see the decent oven spring.

It has a nice crisp crust and decent crumb, with swirls of blue (purple) and a few larger globs of corn.  Not bad as an experiment.


occidental's picture
occidental

For this Community Bake of Infinity Bread bake I decided to use some blue corn from New Mexico that a friend gave me this summer.

I started by refreshing my sourdough starter with 25 grams whole wheat and 75 grams AP along with 100 grams of water.  Not long after I soaked 100 grams of sesame seeds in 175 grams of water.  

Once the starter reached peak bubbliness I mixed up the dough.

Dough Formula:

  • 100 grams refreshed starter
  • 125 grams bread flour
  • 125 grams whole wheat flour
  • 125 grams blue corn flour
  • sesame seed soaker plus all water from the soaker
  • an additional 125 grams of water (300 grams total including soaker water)
  • 13 grams salt

I mixed by hand, allowed it to rest, than kneaded in the bowl.  I did two stretch and folds at about 1 hour intervals.  I continued to ferment another 2 hours or so. The dough did not rise too much.  I then put the dough in the fridge to continue to ferment overnight.  The next morning I removed the dough from the fridge, shaped and let rise and warm for about two hours.  I heated the oven loaded with a cast iron combo cooker to 450 F.  I baked covered for 20 minutes and uncovered for 25 minutes at a reduced temperature of 400 F..  There was a bit of oven spring which was good as the dough didn't rise much during proofing. 
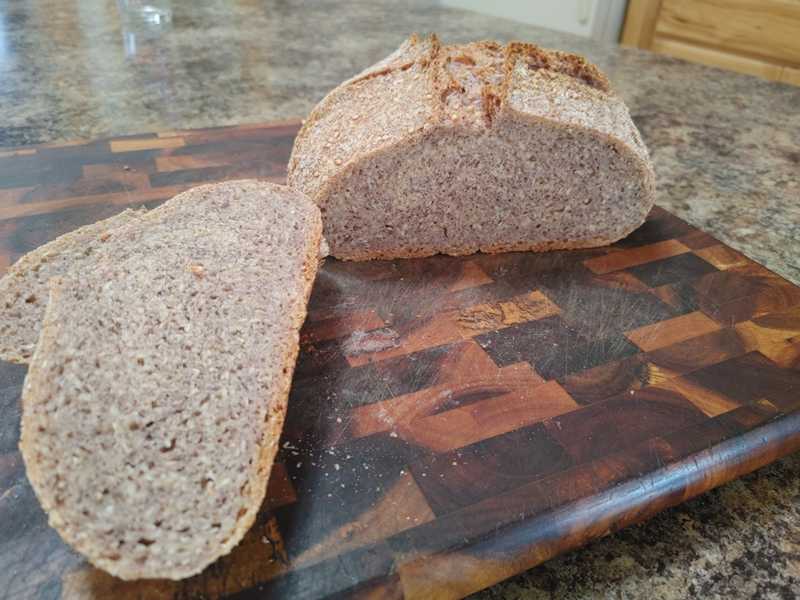
The crust is a bit dense, as was expected, the color has a bit of a purple hue to it, influenced by the blue corn.  The taste is very nutty, with some good crispness to it due to the sesame seeds.  Overall this came out better than I was expecting, not having baked bread with blue corn before.  If I tried it again I might reduce the % of blue corn to the 15-20% range to get a bit less dense bread, but these proportions met the intent of the community bake and it was a good experiment overall.


occidental's picture
occidental

I made my first attempt at Hammelman's Olive Levain yesterday and am pleased with the result.  The formula calls for mixing in the olives on the low speed in your mixer once you are done kneading but that didn't work for me.  I dumped the whole mess out on the counter and worked in the olives by hand kneading.  I retarted the formed loaves for about 5 hours while out for an afternoon hike then baked it up  as the centerpiece for dinner.  The flavor is fantastic and the olives have infused their taste througout the loaf.  I think I'll be making this one again.

The loaves:


The crumb:


occidental's picture
occidental

Wow, it's been a bit over a year since my last post.  Time to rectify that!  I baked my first loaf in 2012 a few days ago.  I meant to bake Susan's Simple Sourdough but after going by memory and adding too much water I had to improvise a bit to keep the overall hydration in the ballpark of what it should be.  Anyhow, the loaf turned out great, with a crackly crust and a fairly open crumb.  Best to all your baking efforts in 2012.

occidental's picture
occidental


I needed something to accompany Christmas dinner.  I went with something that doesn't take a ton of effort and produces a fairly reliable tasty loaf.  I found one of David's recent postings on his masterpiece formula: San Joaquin Sourdough Updated (thanks David) and went forth.  I followed the formula fairly close except that being away from home I'm lacking a few standard tools and supplies.  I substituted the rye flour with whole wheat.  I also did not have a stone to bake on so I went with my fall back method - no preheat.  The ready to bake loaf is placed in a cold oven with a pan of water on the lower rack.  The oven is turned on and the prolonged time the burner is on creates plenty of steam and enough intense heat to cause some good oven spring.  And boy did I get oven spring.  This is one of the most impressive looking loaves I have produced.  You can carry this loaf by the ear.  The taste was great, as usual, and I even got some cracking of the crust.  I hope you all had a great Christmas.  On to the pics....

The loaf


Happy Holidays TFL'rs!!

Happy Holidays TFL'rs!

occidental's picture
occidental

After reading several posts about Hammelman's Vermont sourdough with increased whole grain I decided to give it a try.  I've been impressed with my results from the basic Vermont Sourdough and this version didn't let me down either.  I found the errata sheet on the web here: ( http://mellowbakers.com/ErrataSheetJune2010.pdf ) and used those amounts to put the formula together.  I proofed one loaf in the kitchen (~67 degrees) and the other in the garage (~50 degrees) to account for the extra time the second loaf would be proofing while the first one baked.  I baked the loaf from the kitchen first followed about an hour later by the one from the garage.  I baked both using the 'magic bowl' steaming method.  There was quite a difference in the loafs. The kitchen loaf didn't have much oven spring, while the one from the cooler garage had great oven spring and is one of the best looking loafs I have ever baked.  The crumb is similar in both loaves.  The taste is great, although I can't say there is much of a taste difference between the two loaves. I will definitely be making this formula again.  Here is a pic of the loaf with the great oven spring:

Pages

Subscribe to RSS - occidental's blog