The Fresh Loaf

A Community of Amateur Bakers and Artisan Bread Enthusiasts.

pmccool's blog

pmccool's picture
pmccool

This past Friday, I taught a class on rye breads at the Culinary Center of Kansas City.  The class was scheduled to run from 10:00 a.m. to 3:00 p.m.  Three different breads were featured: the rustic pumpernickel from ITJB, Eric's fav rye (compliments of the late Eric Hanner), and a vort limpa.  That gave a nice sampling of the diversity of rye breads.  We were able to bake both the pumpernickel and the vort limpa during class; students then took the dough for Eric's fav rye with them to bake at home.

I had had some concerns about the drawing power of a full-day class on a week day.  As it turned out, all 20 slots were taken, with a waiting list in case of any cancellations.  So, yes, there is enough interest, in spite of the schedule.  No doubt the inclusion of a $20 gift certificate for Pryde's of Westport, a local kitchen supply store, figured favorably, too.

A number of the students were familiar to me from previous classes, which makes for a pleasant time.  Based on what I saw and heard, and what came through on the feedback forms, it was a fun day for the students as well as for me.  Most were new to rye breads and to sourdough, so they were pleased to gain some new experience and to receive some starter to take home to use for future baking.

One of the Center's requirements is that the instructor provide food for the students.  In the case of an evening or half-day class, that is typically something to snack on; usually whatever is being made in the class.  In the case of an all-day class like this one, it is lunch.  It was a no-brainer to plan lunch around the three breads being taught.  That led to cold cuts and condiments and pickles/olives/peppers, with fresh fruit for dessert.  

Consequently, I needed to bake bread ahead of time to have it ready for the lunch of Friday.  That worked well, since it also did double duty as object lesson so that people could see the finished product, too.

If you have baked the rustic pumpernickel from ITJB, you know that it is dark and dense and fragrant with rye.  There's no molasses, coffee, cocoa, or caramel color in it, nor does it have a prolonged bake.  My belief is that the scald contributes strongly to the dark coloring and the moistness of the finished bread.  Then, too, all I can find in local supermarkets is Hodgson Mills stone-ground rye flour, which is pretty hearty stuff in its own right.  Even with heavy steam, the loaf experienced some cracking but no blowouts.

The vort limpa is a party in a compact loaf.  It is redolent of molasses, orange zest/juice, anise, fennel, cardamom, and beer.  With a smear of sweet butter, it's practically dessert.  And it still makes for some darn good sandwiches and toast, too.

Many, many of you have made Eric's fav rye and know that it is a stellar example of a deli-style rye bread.  It makes a magnificent base for a wide range of sandwiches.  While I enjoy the bite of the caraway, my wife often prefers it when I substitute either fennel seeds or dill seeds for the caraway.  No matter how you tweak it, this is a seriously good bread.

With those out of the way, I needed to build up my starter to have sufficient for 21 batches (20 students + 1 instructor demo) of the pumpernickel and Eric's fav rye, plus enough to give away.  That turns out to be a lot of starter.  Really, really, a lot.  Keep in mind that this class was initially planned last summer.  At that time, I was focused more on pulling together the bread descriptions for inclusion in the advertising and the formulae to go into the student's class booklets.  There should have been some thought given to the amount of prep.  I know that now.  Yes, I do.

For instance, this is what all of the scald for the pumpernickel looks like with half of the sponge incorporated.  You can see that it occupies most of one end of my kitchen's island:

The lighting isn't very good; it's all down light from the ceiling and island light fixtures.  There isn't a lot of ambient light at 6 a.m. in January here in Kansas.

This is the second half of the pumpernickel's sponge, ready to mix in with the scald; nothing but rye flour and water, and it smells wonderful!:

Sponge and scald, ready for the final mix (I could have used a big spiral mixer right about now).  Note that the sponge is lighter in color than the scald, even though both are made with the same flour:

Needless to say, it took a number of trips to schlep all of the ingredients from my kitchen to the car, and then again from the car into the teaching kitchen.  I suspect that we will rerun this class at some future date but there may be a change in the lineup that reduces the amount of prep I have to do.

There aren't any photos of the actual class.  I didn't think to grab my camera on the way out the door and there wasn't time to use it, anyway.  

My students were an interesting group.  The youngest may have been in their late 20s or early 30s.  The oldest were, well, older than me and I'm 57.  One couple took a day off from work to attend.  All were alert and inquisitive, with lots of good questions.  We had a lively discussion about how to begin and maintain a starter, which would have been shorter if I hadn't misunderstood a key part of one inquiry.  ;0  During the course of the day, there were a lot of questions about dough consistency and how it was affected by the amount of flour or water people worked into their doughs.  I had talked at length about how sticky some of the doughs would be and not to try to kill the stickiness with flour.  A few still wound up with some stiff doughs that needed more water.  Some students were almost completely new to bread making while others had some good skills.  Tips on shaping and docking and slashing led to another flurry of questions.  These are all areas where the hands-on aspect is hugely valuable, since a book just cannot provide that tactile feedback.

It was very satisfying to share these breads with such an eager group of learners.  And it was a very full day.  I was happy to climb into bed that evening.

Since one student was a no-show, and since I had intentionally made more starter than I expected to use, I wound up making a double batch of Eric's fav rye on Saturday and a double batch of Hamelman's sourdough walnut raisin rye on Sunday.  We have happy friends.

Paul

pmccool's picture
pmccool

More than a little irony in that title...

Let's talk about the new, first.  That would include the second edition of Hamelman's Bread and the pain de mie formula found in it.  It would also include some new Pullman pans that I picked up recently.  The book is remarkable, as many before me have said.  I don't see this one getting shoved aside by future books, as has happened with some that I own.  Yes, there are a few nits (why weren't the home formulae in metric units instead of English units?) but they are rather trivial compared to the quantity and quality of information residing between the covers.  The Pullman pans figure as a long-delayed gratification.  When faced with that much "new", why not put all of them together?  And then, to really put it over the top, why not employ a previously unused shaping technique?

That takes us to the "could be improved" part of the tale.  Not the formula, mind you, nor the pans, either.  The dough was a real treat to work with, especially since I usually work with breads having a significant percentage of whole grains.  It was smooth, silky, satiny; embodying all of those lush descriptors that cookbook authors love to employ.  The new (to me) shaping technique even worked nicely, thanks to txfarmer and others who like assemble their loaves from smaller components.  And the finished bread tastes wonderful, too.  

Everything appeared to be going well in the early stages:

There's just one niggling little problem.  Someone (I need to get an assistant, if only to serve as whipping boy) miscued on the dough quantity calculations.  It wasn't a fat-finger mistake, either.  More like a fat head mistake.  I shouldn't be so negative.  This bread actually achieved something that many home bakers want to emulate in their breads: ears.   No, no, no, not that kind of ears, this kind:

Maybe I should call them eaves, instead of ears.

Anyway, the loaves have a beautiful fluffy core, perhaps 2.5 inches across, with an approximately .75 inch wide perimeter band that is dense and firm.  Quite firm.  Oh, okay, it requires some serious chewing!  Not your Momma's Wonder Bread by any stretch of the imagination.  The crust is lovely, though.

Just guessing, but I probably had about 15% too much dough for the pans.  Thank goodness for a non-stick lining and some generous greasing before putting the dough in the pans.  The lids were somewhat reluctant to release but came off without requiring excessive force or causing harm to anything.  

I think I want to try this bread again, albeit with the right amount of dough in the pans.  If that works as I expect it can, the next step will be to experiment with some of Hamelman's ryes, baked in the Pullman pans.  If I get really brave, I may even try the Horst Bandel pumpernickel.

Despite my frustration with myself, it was a fun experience to play with a new bread, new pans, and a new technique.  And I've only scratched the surface with this book!

Paul

pmccool's picture
pmccool

The first week of December featured a lot of baking, in marked contrast to the prior week.  Having my hands in that much dough was a genuine pleasure.  Even better was the knowledge that most of it was for the benefit of others, rather than for myself.

On Saturday, December 1, I finished my shopping and dropped off the ingredients in preparation for a class at the Culinary Center of Kansas City.  I also prepared biga that evening for a batch of Stollen.  On Sunday afternoon, I prepared and baked the Stollen, three loaves worth, and two loaves of a Bohemian Christmas Braid.  Students who get to see what the finished product looks like, and enjoy eating it, in class go home happier than those who do not.  (And they did like the taste of these breads!)  On Monday evening, I prepped enough biga for 20 batches of Stollen. 

The Bohemian Christmas Braid, before and after glazing (it's easy to see why my wife handled braiding duties for our daughters' hair):

And the stollen, prior to basting with melted butter and blanketing in sugar:

The class on Tuesday evening ran from 6:30 to 9:00.  I arrived at the Center just after 4:30 and spent the next couple of hours prepping ingredients, portioning the biga, and prepping one batch each of Stollen and Braid dough so that they would be available for demonstrating shaping techniques.  Meanwhile, my assistant was setting out the required implements at the student workstations and taking care of other room preparations.  The students started rolling in as we were wrapping up our set-up steps, so we were able to start right on time. 

The students ranged from bread baking newbies to experienced bakers wanting to pick up some additional information about the specific breads being taught that evening.  For instance, one lady was curious about what adjustments she would need to make since she mills her own flour at home.  Regardless of their experience levels, they were a wonderful group to work with and I thoroughly enjoyed our time together.

It’s interesting how little things crop up.  We ran short of fruit peel for the Stollen because I made a mistake in my estimating.  However, we had more raisins and currants than required, which I had anticipated, and that allowed us to make up for the shortfall in the fruit peels.  It also gave a good opportunity to illustrate how to be flexible while baking, adapting to unforeseen circumstances.  I’m still scratching my head about the flour though.  Since I didn’t have the final count when I shopped, I assumed that all 20 places would be filled.  From what I calculated, we needed about 42 pounds of flour; therefore, I picked up a 50-pound sack at Costco.  We used up every bit of that flour and pulled some from the Center’s pantry!  Since I haven’t found an error in my calculations, it’s still a mystery to me how that much flour was used. 

On Friday, December 7, I baked 6 loaves of a Honey-Oatmeal Cinnamon Swirl Raisin Bread, adapted from the Honey-Oatmeal Sandwich Bread in the KAF Whole Grain Baking book.  Six, because that’s as many 9x5 bread pans as I have and because that’s as many as can easily fit in my oven.  Then on Saturday I made 4 more loaves.  We hosted the Christmas party for my wife’s colleagues on Sunday and the bread was for gifts for them and for some other friends.  And one for us, too!  In addition to making fabulous toast, this bread goes really well with ham and cheese.  Other baking that Saturday for the party included about 3 dozen Eggshell Rolls from Clayton’s Complete Book of Breads and Rye Rolls, source not recalled at the moment.  The Rye Rolls got a bit of a tweak when I substituted 1 teaspoon of caraway and ½ teaspoon each of coriander and fennel seeds, crushed, for the called-for 2 teaspoons of caraway. 

Honey-Oatmeal Cinnamon Swirl Raisin Bread dough:

Baked and bagged:

Eggshell Rolls:

Rye Rolls:

The  Honey-Oatmeal Cinnamon Swirl Raisin Bread also marked the first time I have used the Great River brand of whole wheat flour.  I had picked up a 10-pound bag at our local Costco, having seen it there for the first time.  I believe PostalGrunt mentioned it in a recent post of his, too.  Based on my experience, I like this flour.  The grind is quite fine.  I should buy some Wheat Montana flour again to see whether one has a finer grind than the other, or if their textures are approximately equal.  The bran flecks are the same size as the rest of the particles.  My first guess would have been that the flour is produced with roller mills but the Great River Milling site says it is stone-ground.  Although I couldn’t locate a precise analysis, GRM says that their bread flours are milled from hard red spring wheat and “we strive to purchase wheat that contains 14 percent protein and strong gluten content.”  From a purely empirical point of view, I’d say that they hit their target for the bag I purchased.  Not surprisingly, I had to increase the liquid content to achieve the desired dough consistency.  The resulting dough handled well and rose well, too.

The Great River flour bag:

This past weekend I made a batch of Cromarty Cob from Andrew Whitley’s Bread Matters. Having blogged about this bread previously, here, I won’t go through a blow-by-blow account this time.  I made two deviations from Mr. Whitley’s formula and process.  First, I increased amounts by 50% to produce two medium-size loaves, rather than one large loaf.  Second, I let fermentation proceed at ambient temperatures in my kitchen, which ranged from 65-68F, instead of the recommended 82F temperature.  As a result, fermentation times for the levain and for the final dough were in the 12-hour range, each.  With the whole-wheat content being approximately 50%, this yielded a bread with a noticeable sourdough tang.  The wheaty flavors that were masked by the cinnamon and raisins in the Honey-Oatmeal Cinnamon Swirl Raisin Bread get to shine in this loaf, too.  I expect that using a higher fermentation temperature would lead to a bread with a more subtle sourness and, therefore, a more wheat-forward flavor and fragrance.  As it is, I’m every bit as happy with this bread as I was the first time I made it.  And I’m happy to have found another high-quality whole wheat flour to work with that doesn’t inflict exorbitant shipping costs.

Since odds are pretty good that I won’t post any new blog entries between now and Christmas, please let me wish each of you a blessed and merry Christmas.

pmccool's picture
pmccool

While there has been some baking going on here, most of it has been very pedestrian; basic stuff like sandwich breads and pain au levain.  With our kids and their kids coming home for the Thanksgiving weekend, an opportunity arose to inject some variety.  On the day before Thanksgiving, I made 2 dozen oat-wheat pan rolls.  On the morning of Thanksgiving, I made cloverleaf rolls.  

The treat there was that my just-turning-4-years-old granddaughter, who is very much interested in helping in the kitchen, asked to be involved in the process.  So, Grandpa got some help from Miss Carmen.  She helped with the early stages of mixing.  Later, she assisted with the "smushing" (aka: kneading) of the dough.  Then she helped with shaping the rolls.  The pictures, regretably, have vanished.

It wasn't long before rolling simple balls of dough for the cloverleafs became boring.  So she switched to making carrots.  Although a bit blunt and rather crooked, they did indeed look like rather stumpy carrots.  She was quite pleased with the effect.  The photographer, sadly, did not record this variation; she was probably distracted by Younger Brother.  Grandmas tend to be easily distracted by grandchildren, especially by 2-year-olds with huge brown eyes.  Carmen was delighted with the outcome and made sure to ask for a carrot roll with her meal.

Grandpa is still bemused by the way that much help resulted in more work to be done.  Even so, it was lots of fun.

Paul

pmccool's picture
pmccool

Whew!  All of the planning, all of the strategizing, all of the preparation, all of the anticipation, and poof!, it's all history now.

Thirteen wonderful students showed up a few minutes before 9:00 this morning for a class on breakfast breads at the KC Culinary Center, ready to learn about kolaches and sourdough English muffins.  With the support of my able assistant, Kay (who somehow managed to stay out of the photos), I was able to get through all of the material in the allotted 3 hours.  Along the way, we talked about flours, sourdough starter maintenance, dough texture, the differences between sticky/tacky/dry doughs, how to adjust dough moisture content if it was too sticky or too dry, the advantages of weight measurements over volume measurements, why English muffins are better fork-split than sliced, how kolaches can play sweet or savory, and a other life-altering topics.  Flour flew, laughter rang, dough got onto all kinds of surfaces, muffins and kolaches were consumed.  I think just about everyone took a chunk of starter for further experimentation at home.  All in all, it was a fun morning.

Several students said that they will return in December for the Christmas breads class, so I'm not the only one who thinks things went well.  And Kay, who has seen a bunch of classes and instructors, said it was a good session.  She is excited that the classes I have scheduled for this term feature breads that no one else has taught at KCCC.  

I did manage to squeeze in a few photos when the students were busy and I could step back for a moment.  There aren't as many as I would have liked but, hey, I was just a bit busy most of the time.

First up, 3kg of sourdough starter on Friday evening, ready to go into the sponge for the English muffins.  This is the result of two builds, one Thursday evening and another Friday morning:

If that sounds like a lot of starter, take a look at how much sponge it launches:

The Coke can gives an idea of the scale.  All of this had to be transported this morning from my house to the culinary center.  I might try a different strategy next time...

Next up, some English muffin consumption:

Yeah, they were good!  This group thought so, too:

And then it was time to go to work on kolaches:

And another table of kolache bakers (the young lady at right front will be heading off soon to the Johnson & Wales culinary school in Denver):

And the third group of kolache bakers:

As you can see from the photos, the students really focused on what they were doing.  They asked lots of good questions and made sure that they understood the answers.  It's fun to work with a lively and interested group like this!

The format for the class involved some "TV cooking" to make sure that we covered all of the bases in the amount of time that we had.  We actually worked backwards, beginning with shaping prepped dough for the English muffins.  That was followed by shaping the kolaches, also working with prepped dough.  Then we came back to the English muffins, cooking them and taking a short break to eat some muffins, answer questions, and talk about what we would do next.  I demonstrated a cheese filling for the kolaches and used it to fill some of the kolaches.  Since we were time-constrained, I used canned cherry pie filling to fill the rest of the kolaches.  The kolaches then went into a preheated oven.  Then it was back to the work stations to mix the final English muffin dough, using the prepped sponge.  Once that was mixed and kneaded, each student bagged his/her dough and put it into the refrigerator to griddle at home later.  Then we shifted to the kolache dough, with each student preparing, mixing, and kneading the dough from scratch.  That, too, was bagged and refrigerated to take home.  We finished with some questions and answers, much of which focused on how to use the starter that I handed out (which was at 50% hydration) if they were to make another batch of the English muffins at home, given that the EM recipe calls for 100% hydration starter.  That gave a good opportunity to underline measuring by weight and to explain how adjust quantities of flour and water to achieve a specific hydration level.  I never said "bakers math" out loud but that was effectively at the core of the discussion.  Once that process was clarified, we were at the end of our session.  Everyone gathered up their doughs and their starter samples and headed home.

I stayed to debrief with Kay and go through the student feedback forms.  One of the things that she noted was how there was lots of chatter among the students as they were leaving, which was a good sign.  Kay said that if people slide out without saying much, it usually indicates dissatisfaction.  The feedback forms confirmed what she had observed, with complimentary comments from the students.  I say that with a sense of relief, not braggadocio.  Some of the students are effectively "frequent flyers" at KCCC, so I don't want to do anything to drive them away.  Nor do I want to develop a reputation as someone to be avoided.  More importantly, bread should be fun and I want my students to walk out the door knowing that they can do exactly what we did in class and have it turn out well.

After some cleanup and gathering up what I had brought with me, it was time to go home, which is where my wife snapped this photo:


pmccool's picture
pmccool

Just for grins, I searched for flour mills in the USA that sell to the public.  It was a fun exercise.  In addition to the larger, better-known names such as King Arthur Flour, there are some mills that are probably in TFLers’ back yards.  Since I don’t know most of the millers or their products, I leave it up to you to do your own experimentation.


Please note that I focused primarily on sources that have on-line stores.  That means that I left out some that sell only through localized retail outlets.  Also note that some of these are very small and may have limited offerings, such as only cornmeal.  And I’m sure that the list is in no way exhaustive.  Feel free to add your own suggestions.


The list is in no particular order.  However each listing will be in the form of mill name, state, website.  Here’s the list:


Lakeside Mills, North Carolina, website

The Stafford County Flour Mills Company, Kansas, website (I can find their products in supermarkets in the KC area)

North Dakota Mill, North Dakota, website

Prairie Mills, Indiana, website

Shawnee Milling Company, Oklahoma, website

Dakota Prairie Organic Flour Company, North Dakota, website

Sunrise Flour Mill, Minnesota, website

Wade’s Mill, Virginia, website

Heartland Mill, Kansas, website

Oakview Farms Granary, Alabama, website

Anson Mills, South Carolina, website

Calhoun Bend Mill, Louisiana, website

Orchard Mills, Louisiana, website

Homestead Gristmill, Texas, website

Natural Way Mills, Minnesota, website

Giusto’s Specialty Foods, California, website

McEwen and Son, Alabama, tel. 205-669-6605

Montana Flour and Grains, Montana, website

Stanton’s Mill, Maryland, tel. 301-895-4415

Nora Mill Granary, Georgia, website

Dellinger Grist Mill, North Carolina, website

McGeary Organics, Pennsylvania, website

King Arthur Flour, Vermont, website

Greenfield Mills, Indiana, website

Arrowhead Mills, Colorado, website

Bob’s Red Mill, Oregon, website

Wheat Montana, Montana, website

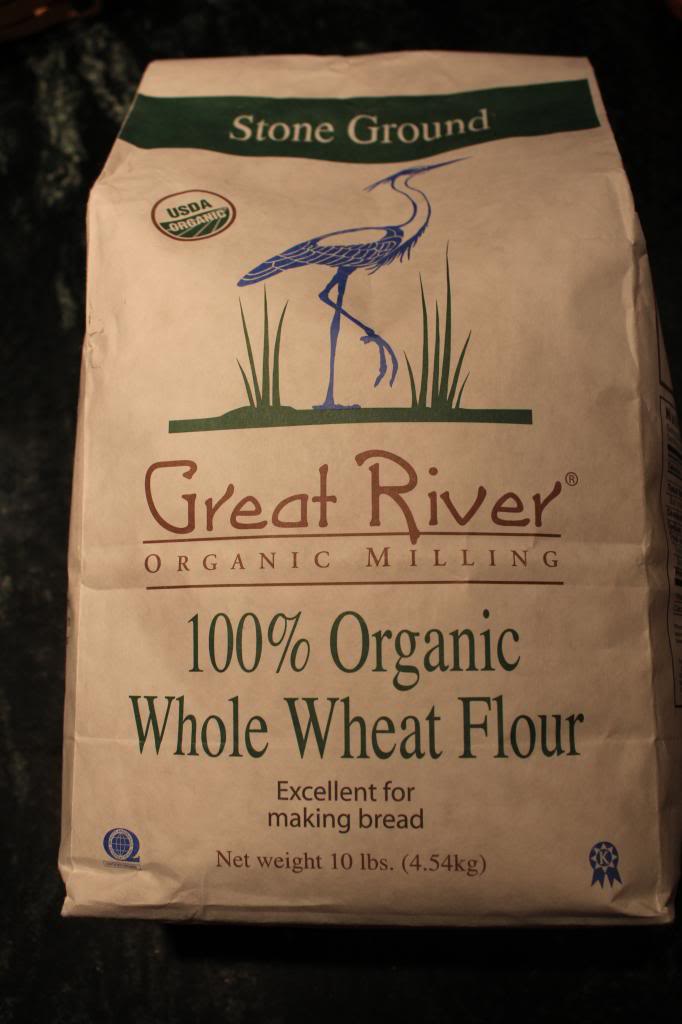
Great River Milling, Wisconsin, website

The Mill at Anselma, Pennsylvania, website

Hodgson Mill, Illinois, website

I also came across this listing of operating gristmills, which may be of interest.

And, just when you thought you knew all about stone-ground flour, here’s The Stone Cold Truth About Stone Ground Flour.  Worth a rant or two, I’m sure.

Enjoy,

Paul

pmccool's picture
pmccool

Last weekend had me going.  My work schedule gives me every other Friday off and last weekend was one of my 3-day weekends.  First up, repairing some of the heat and drought damage that my yard suffered.  Lots of weeding and raking and seeding and watering, followed by loudly protesting muscles and joints.  But it's done.  In another week or so I should be seeing new grass growing in areas that were entirely killed.

Saturday was pretty low key, given the ongoing protests mentioned earlier.  Still, I did manage to get in a batch of the NY Deli Rye from the BBA for this week's sandwiches.  Love that stuff!

Sunday afternoon, protests or no, was given over to some further test bakes in preparation for the classes that I will be teaching in a few weeks.  First I mixed up a batch of Bavarian Christmas Braid.  It's a beautiful dough, slightly sweet and redolent of mace and lemon zest.  The almonds and brandy-soaked raisins don't hurt anything, either.  The bread is made up as a small braid stacked on top of a larger braid, which makes for a very pretty loaf.  In the hands of a competent braider, it would be downright beautiful.  After coming out of the oven and cooling slightly, it is drizzled with a light glaze flavored with almond extract.  

Here is how it looked just out of the oven:

And after glazing:

Not being particularly fond of candied cherries, I elected not to garnish the loaves.

While the braid dough was fermenting, I got to work on candying some orange peel that would be needed for some stollen (currently fermenting as I write this).  I'd never done it before and was pleasantly surprised to find how simple it is.  A bit tedious, yes, but not difficult.  Since the Web is rife with instructions, I'll not duplicate them here.  However, I will share some pictures of how they turned out.

Just out of the syrup:

Starting to dredge in sugar:

And all done:

Last but not least, some savory muffins rounded out the day's baking:

Paul

pmccool's picture
pmccool

I have been on a baking hiatus, of sorts, realizing that the stash of bread in my freezer needed to be reduced.  Having worked through that gradually, I finally got around to baking again the weekend before Labor Day.

What my mouth wanted was something robust, chewy, mildly tangy, and thoroughly wheaty.  And it had to serve as a reliable foundation for sandwiches.  What to do, what to do?  Leader's Local Breads beckoned, and in it I found the Whole Wheat Sourdough Miche, modeled loosely after the Poilane miche.  After checking the metric weight quantities (which are generally less error prone than the others in this book) and deciding that it was safe to proceed, I hauled my starter out of the refrigerator and gave it a couple of good feeds.  It didn't take long for the starter to bounce back to vigorous health, especially with kitchen temperatures just slightly below the 80F mark.  It more than doubled in less than 5 hours!  

For once, I stuck pretty closely to the formula and process.  The one deviation of note was that I dissolved the levain in the water before adding the rest of the final dough ingredients.  Since I mix by hand, I find it easier to do that than to mix the levain into the already-mixed dough as Leader instructs.  Other than making my life easier, I don't see that it makes any real difference in the outcome.  Because of the warmth of my kitchen that day, I did have to trim fermentation times to avoid over-fermenting the levain and the final dough.

The outcome, by the way, was stunning!  A deep, brown-verging-on-black crust, lightly crackled; a firm, moist crumb; a heady aroma redolent of toast with sweet and tangy overtones.  I can't remember a recent bake that I was happier with than this.  And then there is the flavor!  It was everything the fragrance promised, and more.  Roasted nuts and malt, a gentle hint of acidity, a down to earth wheatiness, and other good things that I don't have words for.  The crust, after cooling, was more leathery than crisp but that played well against the moist coolness of the firm crumb.  The crumb texture is rather fine-grained for this style of bread; that comes from the extended kneading that Leader recommends.  Frankly, I didn't knead it as long as he recommends and I might even cut it back to just a couple of minutes of kneading for future bakes, combined with more stretch and folds to build strength.  That would open the crumb somewhat, but not to the point that condiments would be oozing out of sandwiches.

Here's a picture, which doesn't do the bread justice:

Good stuff, even if it is me that says so!

Both our daughters and their families were with us for the Labor Day weekend, which gave me the excuse to do some additional baking.  The tally for the weekend included Portugese Sweet Bread as rolls for barbecue pork sandwiches, sourdough English muffins for one morning's breakfast, and lemon oat scones for another breakfast.  Fun!

Now I need to finish testing the breads that I plan to teach at the Culinary Center of Kansas City, starting in November.  More fun!

Paul

pmccool's picture
pmccool

Although my baking has waned recently because I need to reduce the bread backlog in my freezer, it hasn't gone entirely dormant.  For instance, I baked some hamburger buns today (thanks, dolfs!) as a demonstration/interview for an instructor's position with the Culinary Center of Kansas City.  It was a lot of fun and felt more than a little bizarre.  After all, I am, to steal proth5's pet expression, just a raggedy home baker, not a professional chef/baker.  Still, any time that you get to talk to people about baking bread is a pretty good time.  And I apparently managed to do so in a coherent fashion because they asked me to teach for them.

The demo was slated as a 30-40 minute session in front of six of the CCKC staff and instructors, followed by their feedback.  That's a very small slice of time to work with, so I broke it into two separate phases and applied some "TV cooking" tricks.  The first phase was to demonstrate the mixing and kneading of a single batch of dough (using pre-measured ingredients), fielding questions as I went.  Some of the reviewers are bread bakers, some are not.  From a previous test run with the dough, I knew that I did not want to add more flour to the dough.  I also knew that the butter content was high enough that the dough would not stick to the work surface.  Consequently, I only did a rough mix and dumped the not-entirely-cohesive mass out onto the work surface, which was a polished marble or travertine material.  That elicited a few questions about why I wasn't worried about the whole thing sticking, so I showed them how the butter in the dough was keeping my hands and the counter comparatively clean.  I only kneaded it enough with the push-turn-fold-push method to get everything to hang together, then started French folding, a la Richard Bertinet.  That triggered a number of questions and comments, since none of them had seen that technique previously.  They were impressed with how easily the dough developed and smoothed out, and with how it picked up the initial goop from the countertop.  Putting that aside, I pulled out six batches worth of dough that I had made prior to leaving home for the demo and put each of them to work shaping the dough into the bun type of their choice, with pointers on how to achieve the various shapes.  I gave them tips for the final fermentation and baking (they have plenty of ovens to work with at the center) and that was the end of the demo.  Next up was listening to the critiques, which were uniformly positive and provided some very useful tips for me as a presenter.

So, the next step is to work out what courses to offer and to get them scheduled.  The catalog for the November 2012 - April 2013 semester is being developed now, so my timing was good.  I'll probably teach once, perhaps twice, a month.  This promises to be a lot of fun and I'm really looking forward to sharing the joy of good, home-made bread with others.

Paul


pmccool's picture
pmccool

Although my posting has been erratic, baking has continued at a fairly steady pace.

The Saturday of the Easter weekend, I baked Beth Hensperger's Sweet Vanilla Challah from her Bread Bible.  It is a favorite of my older grandson and we took a loaf with us for dinner with he and his parents.  I've blogged about it previously.  By the way, if any lasts long enough, it makes some of the best french toast, ever!  The turban shape is still a favorite of mine for its elegance and simplicity:

I also baked some honey whole wheat bread that same day for sandwiches:

This weekend, I managed to squeeze in a pain au levain with whole wheat, from the King Arthur Whole Grain Baking book.  One loaf was served at dinner with friends today and one went home with them (along with a bunch of hostas that were getting too big for their growing area.  Loaf:

Crumb:

I had elected to do some kneading for the dough, followed by a single stretch and fold about 45 minutes into the bulk ferment.  My rationale was that I wanted a finer, rather than more open, crumb.  It worked.  Other tweaks included bumping up the quantities by about 40% to achieve slightly larger loaves and using an autolyse of nearly an hour, which is longer than mentioned in the formula.  Otherwise, I hewed to the directions and was rewarded with some bread that is pleasing to the eye and the tongue.  

Paul

Pages

Subscribe to RSS - pmccool's blog